
Tips for posing people and pets in interior spaces
Without a doubt
It took me some time to develop my confidence and understanding of how to direct people and pets effectively through the lens. Contributing factors have not only been a devoted lover and pet owner all my life but it’s also been the invaluable experience I gained from shooting weekend weddings, alongside my interior photography work.
I’m sure that every one of us can relate to those anxious feelings of awkwardness when we’re suddenly asked to stand on the other side of the camera.
It is indeed challenging to be organised and confident to direct people into relaxed, everyday poses and nail the composition in a single shot.
“People are at their best when they can be natural. And that is the hardest thing as a photographer” — Platon
On-trend
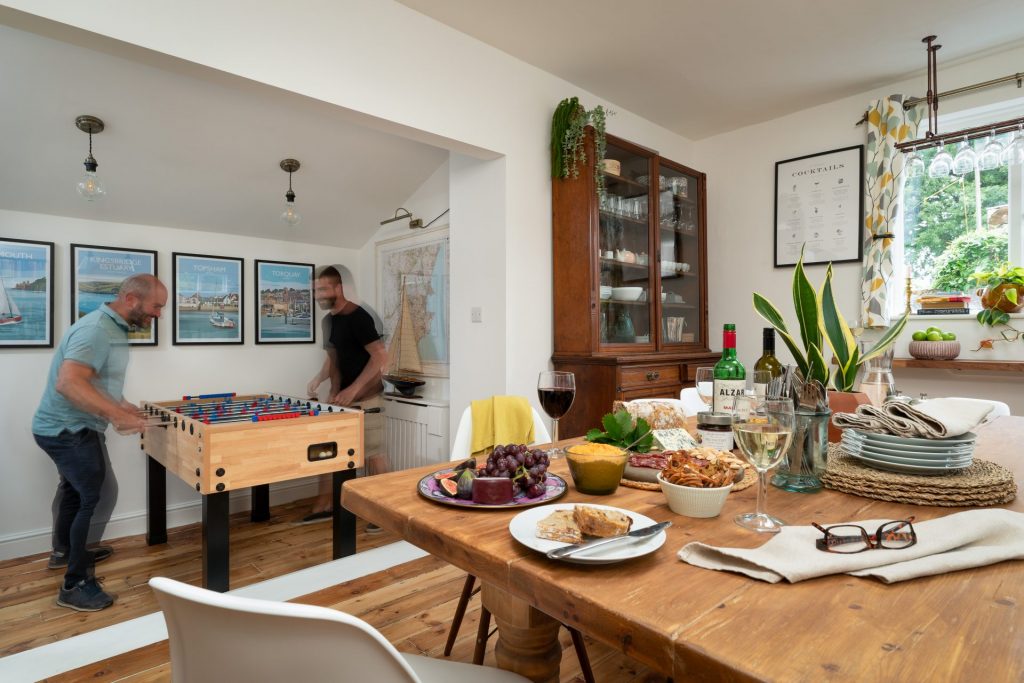
It’s become increasingly popular in recent years to incorporate a human or animal presence into interior and architectural spaces, which can be very effective when done well. It is human nature to explore, influence, and refine ways to entice and extend the viewer to linger a little longer on a picture.
After all, architecture and interiors are designed for people to inhabit and enjoy – to live, work, and play in. A positive interaction between us and our environment can be achieved by including characters in photographs.
My favourite thing is when there is a dog or cat in the house and they can hang out as I photograph. “Eventually, the animals become curious about what they’ve been watching.

Aim
It is obvious to point out that each interior or building has its own function and motivation.
The most captivating and relatable experience we all share is how we live within our habitats.
Whether on a minor or major scale, the directed photographs we strive to create masterfully are parts art and part marketing. The result is the wonderful impact a photograph can have on our aspirations and dreams.
“What good is a dream home if you haven’t got a dream?” — Julius Shulman
Want to know more
Nuts and bolts! Listed below are a few of the practical reasons why many photographers choose to include people and animals in their photographs:
- Adds human or animal scale.
- Represents how people and animals experience and move through the rooms or spaces.
- A space looks livelier and more enjoyable with people and animals within it.
- The image evokes intrigue and invites viewers to picture themselves in the setting.
- By enhancing the negative space, the addition of people can improve the overall composition.
- Some areas and how the space is used are highlighted by the presence of people.
- The images tell a story rather than merely illustrating a location.
Best Practice
Organise yourself
- Before introducing people into the frame — it’s essential to have your composition, camera setup, and lighting exactly how you want it and ready to go.
- If you’re still moving things around a centimetre here and there, you’ll seem disorganised and draw unnecessary attention.
- Children, especially, can be easily distracted if you change your mind and a piece of furniture needs repositioning, or a cushion needs re-fluffing!

How it’s done
- Demonstrating how to stand or pose is often faster and more effective than explaining. You can make people feel comfortable by mimicking, especially if you goof around a little.
- Your best advice is to direct people towards natural everyday activities and movements. We feel a sense of wonder when we see someone looking at a beautiful view, and therefore their gaze directs ours!
- If you can strike a balance with the personalities you’re working with between spontaneity and guidance, it’s more authentic.
Posing a pose!
- Getting started is the first step – be genuine, break the ice, and start a casual conversation. Build on the previous conversation with follow-up questions to learn about the person’s day or the best thing that has happened this week. Doing so will establish trust from the very beginning.
- Direct them in a way that makes sense and makes them feel comfortable. You can achieve better results by asking a person to point their nose towards an object rather than saying “turn your head 20 degrees to the right”.
- You should begin by positioning your subject or subjects roughly where you want them to stand or sit. If they are not professional actors or models, they will not know where to look or what to do with their hands.
- Your model/s will definitely do better if you have them perform an ordinary, everyday task. Simplicity is a virtue, as are effortless tasks such as gazing into a vista, stepping into a doorway, or reading a book.
- By simply straightening the spine, posture problems can be solved easily. In a sense, posture is like the foundation and structure of a building. It keeps everything in place and ensures that the body’s weight is evenly distributed and balanced.
- It is much better for the body shape if the model’s weight is placed on the leg farthest from the camera.
- Whether standing, sitting, or lying down, ensure that your model’s shoulders are relaxed and down.
- When an arm or leg is raised, there is space and separation from the body, and a body part looks more flattering and natural. You can think of the leg stride when walking or an arm reaching out to open a door or bent and resting on your hips. In general, bend it if it bends!
- Be sure not to forget the hands and fingers. Whenever possible, provide your models with an object to hold or an object to interact with (don’t let them dangle). Also, take note of the fingers; in general, they should always be together, slightly bent, and relaxed.
- Next, let’s look at the heads and shoulders! Provide a line of sight for the person. Ask or point at something you would like them to focus on. I know it sounds strange, but you might ask your model/s to push their ears forward a little. Doing so will separate the head from the neck. Finally, shoulders that are turned at an angle look more flattering.
- It is better to turn the model’s nose a little off-centre, pointing either slightly left or right when the model is closer to the camera than usual. This gives it shape and definition without making it the focal point. To put it another way, avoid breaking the natural line of the face with the nose, as this tends to create a proportionally longer nose.
Motion blur vs sharp
Think about whether you want motion blur or a static appearance? In some interiors, motion blur might make more sense and a sharp scene would work better in others, depending on the brief.
- Depending on your preference and the speed of your subject, choose a shutter speed between 1/15 and 1/60 of a second for motion blur.
- To freeze motion in a similar way, you may want to treat your model/s as a ‘light painted layer’, and blend them with your other light layers in post-processing. It is best to photograph people with a broader mask, as this will reduce the likelihood of the masks becoming too complex for each individual.
- Be patient if it takes you ten or more frames to get the result you want.
Frames & shapes
- Within an area, look for ways to neatly frame your models/s.
- Frames can give your photographs a greater sense of individuality and impact.
- A door, a window, an architectural feature, colour shapes, contrasting areas, or negative space are all great ways to frame your subject.
Spatial negative
- The ability to recognize negative space is valuable to improve your composition and draw attention to a person’s activity, posture, or expression.
- Once you have identified the main elements of your composition, pay attention to the surrounding areas in the image. A small tripod adjustment and positioning a person in a dead space can occupy an otherwise boring composition and help add more balance.
- You may be able to separate your subjects by choosing certain camera perspectives. To ensure your model/s are positioned naturally in the architecture, you should pay close attention to spaces with tonal contrast, framing opportunities, or shapes formed by the architecture.
- By following the lead room or nose room principle, you will be able to make the most of negative space. If you want to accomplish this, always have the model/s point toward the negative space, not away from it. When the subject is looking at empty space or toward the edge of the frame, viewing can be uncomfortable.
Conclusion
There is no doubt that the subject matter of this topic is vast and that subjective viewing experiences are always open for discussion.
I sincerely hope you have enjoyed reading about some of my methods and ideas for making your interior portfolios more human.
I find it fun to add people to make things a little more exciting and engaging, and more times than not in life, you’ll find that getting a few friends together, jumping in, and giving it a try, may bring you the results you’re looking for!